
Best Auto Trim Paint: Complete Guide to Restoring Your Vehicle
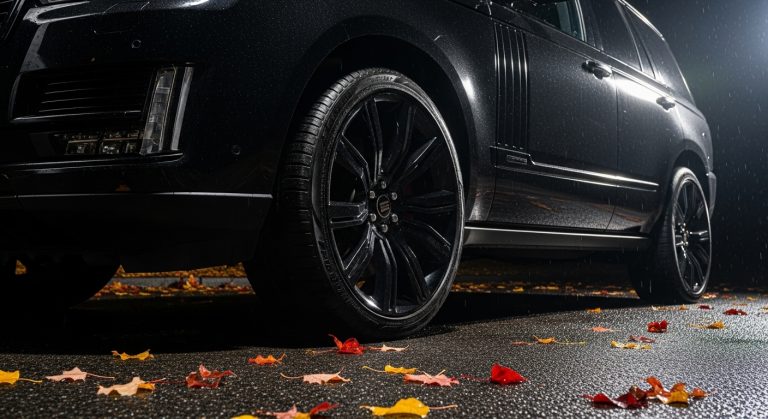
Your car’s trim pieces are constantly exposed to harsh elements, causing them to fade and lose their original luster. The best auto trim paint can instantly transform weathered plastic, rubber, and vinyl surfaces back to their factory-fresh appearance while providing long-lasting protection against UV damage and environmental wear.
This comprehensive guide reveals everything you need to know about selecting and applying the perfect trim paint for your vehicle. Whether you’re dealing with faded bumpers, door handles, or side moldings, the right product can save you hundreds compared to professional restoration services.
Discover which formulations work best for different materials, learn professional application techniques, and avoid common mistakes that lead to poor results.


Key Takeaways
- Proper surface preparation is crucial – Thoroughly clean, degrease, and lightly scuff trim surfaces before painting to ensure maximum adhesion and long-lasting results.
- Choose the right paint for your material – Different formulations work best for plastic, rubber, and vinyl surfaces, so select products specifically designed for your trim type.
- Apply multiple thin coats – Two to three thin, even coats provide better coverage, durability, and professional appearance than one heavy application.
- Environmental conditions matter – Paint in temperatures between 65-75°F with low humidity, away from direct sunlight and wind for optimal results.
- UV resistance is essential – Quality trim paints with superior UV protection maintain their color and finish 3-5 years longer than cheaper alternatives.
- Regular maintenance extends paint life – Clean painted trim regularly with mild automotive soap and apply UV protectants to maximize the longevity of your paint job.
- DIY application can save money – With proper preparation, quality materials, and patience, most vehicle owners can achieve professional-looking results at a fraction of the cost.
Auto Trim Paint Basics
Auto trim paint is specifically formulated to restore and protect exterior plastic, rubber, and vinyl components on vehicles. Unlike regular spray paint, these specialized coatings are designed to flex with the material and withstand constant exposure to sunlight, rain, and temperature fluctuations.
The primary purpose of trim paint is to restore the original color and finish of faded or discolored trim pieces. Over time, UV rays break down the molecular structure of plastic surfaces, causing them to turn gray, chalky, or completely lose their color.
Types of Auto Trim Paint
Aerosol spray paints offer the most convenient application method for most DIY enthusiasts. They provide even coverage and eliminate the need for additional equipment like spray guns or compressors.
Brush-on formulations work well for small touch-up jobs or detailed work around intricate trim pieces. These products typically have a thicker consistency and longer working time.
Pen applicators are perfect for minor scratches and small areas that need precise application. They’re ideal for door handle scuffs or small chips in trim pieces.
Choosing the Right Trim Paint for Your Vehicle
Selecting the correct trim paint depends on several factors including the material type, original finish, and desired durability. Different formulations are optimized for specific applications and materials.
Material Compatibility
Plastic trim pieces require paints that can bond effectively with polypropylene, ABS, and other automotive plastics. Look for products specifically labeled as plastic-compatible or those that include adhesion promoters.
Rubber components like door seals and weatherstripping need flexible coatings that won’t crack or peel when the material flexes. These paints typically contain plasticizers that maintain flexibility.
Vinyl surfaces such as convertible tops or interior trim require specialized formulations that won’t interfere with the material’s natural properties.
Finish Options
| Finish Type | Best For | Characteristics |
|---|---|---|
| Satin Black | Most exterior trim | Natural-looking, hides imperfections |
| Gloss Black | High-end vehicles | Shiny finish, shows scratches easily |
| Textured | Bumpers, cladding | Matches original texture, very durable |
| Matte | Modern vehicles | Contemporary look, fingerprint resistant |
Top Features to Look for in Auto Trim Paint
UV resistance is perhaps the most critical feature in any quality trim paint. Products with superior UV protection will maintain their color and finish significantly longer than cheaper alternatives.
Adhesion properties determine how well the paint bonds to the substrate. Look for paints that specifically mention adhesion promoters or primers built into the formula.
Flexibility ensures the coating moves with the material without cracking or peeling. This is especially important for trim pieces that experience thermal expansion and contraction.
Durability Factors
Chemical resistance protects against automotive fluids, cleaning products, and environmental contaminants. Quality trim paints should resist staining from oil, gasoline, and common car wash chemicals.
Scratch resistance helps maintain the appearance even with regular contact from car washes, debris, and normal wear. Some formulations include hardening agents that improve surface durability.
Temperature stability ensures the coating performs well in extreme heat and cold conditions without becoming brittle or soft.
Surface Preparation Techniques
Proper surface preparation is absolutely critical for achieving professional-looking results that last. Skipping or rushing through prep work is the most common cause of paint failure.
Cleaning Process
Start by thoroughly washing the trim pieces with automotive soap and water to remove dirt, road grime, and surface contaminants. Pay special attention to textured surfaces where debris can hide.
Degreasing is essential for removing wax, polish residue, and oils that can prevent proper adhesion. Use a dedicated automotive degreaser or isopropyl alcohol on a clean cloth.
Scuffing lightly with fine-grit sandpaper (400-600 grit) creates microscopic scratches that help the paint adhere better. This step is particularly important on glossy or very smooth surfaces.
Masking and Protection
Careful masking protects surrounding areas from overspray and ensures clean, professional-looking edges. Use high-quality automotive masking tape that won’t leave residue.
Remove all removable trim pieces when possible for easier access and better results. This also prevents paint buildup in crevices and joints.
Protect nearby surfaces with plastic sheeting or newspaper, especially painted body panels that could be damaged by overspray.


Application Methods and Techniques
Spray application provides the most professional results when done correctly. Hold the can 6-8 inches from the surface and use smooth, overlapping strokes to build up thin, even coats.
Temperature and humidity significantly affect paint performance. Apply trim paint in temperatures between 65-75°F with low humidity for optimal results.
Spray Technique Tips
Multiple thin coats always produce better results than trying to achieve full coverage in one heavy application. Allow each coat to flash off before applying the next.
Maintain consistent distance from the surface throughout the application process. Varying the distance creates uneven coverage and texture differences.
Keep the can moving to prevent runs and sags. Start spraying off the edge of the piece and sweep across in smooth, steady motions.
Brush Application Method
High-quality brushes designed for automotive paints produce the smoothest finish when brush application is necessary. Natural bristle brushes work well with most trim paints.
Thin coats are just as important with brush application as with spraying. Build up coverage gradually rather than trying to achieve opacity in one coat.
Maintain a wet edge by working quickly and overlapping brush strokes while the paint is still workable. This prevents visible brush marks in the final finish.
Common Mistakes to Avoid
Insufficient surface preparation leads to poor adhesion and premature paint failure. Never skip cleaning and degreasing steps, even if the surface appears clean.
Applying paint in poor conditions such as direct sunlight, high humidity, or extreme temperatures can cause a variety of finish problems including poor flow, slow drying, and adhesion issues.
Rushing the process by applying coats too quickly or not allowing proper cure time between steps often results in soft, easily damaged finishes.
Environmental Factors
Wind and dust can contaminate the wet paint surface, creating a rough, gritty finish that’s difficult to correct. Always work in a clean, protected environment when possible.
Direct sunlight causes the paint to dry too quickly, preventing proper flow and leveling. This often results in a rough, orange-peel texture.
High humidity can cause blushing or a milky appearance in the finish, especially with certain paint chemistries.
Maintenance and Longevity Tips
Regular cleaning with mild automotive soap helps maintain the appearance and extends the life of trim paint. Avoid harsh chemicals or abrasive cleaners that can damage the finish.
UV protection through regular application of automotive protectants designed for painted surfaces can significantly extend the life of your trim paint job.
Prompt touch-ups of small chips or scratches prevent moisture intrusion and larger paint failures. Keep some paint on hand for quick repairs.
Long-term Care
Avoid automatic car washes with harsh brushes that can scratch or damage the painted trim surfaces. Hand washing or touchless car washes are much gentler.
Park in shade whenever possible to minimize UV exposure and heat buildup that can accelerate paint degradation.
Inspect regularly for signs of wear, fading, or damage so you can address issues before they become major problems.


Professional vs DIY Application
DIY application can save significant money and provide satisfying results when done properly. Most trim painting projects can be completed by enthusiasts with basic tools and patience.
Professional application may be worth considering for high-end vehicles, extensive damage, or when you lack the time or space for proper DIY work.
Cost Considerations
Material costs for DIY trim painting typically range from modest to moderate depending on the size of the project and quality of products chosen.
Time investment varies greatly depending on the extent of preparation needed and the number of trim pieces being painted.
Tool requirements are minimal for most trim painting projects, making it accessible to most vehicle owners.
Troubleshooting Common Issues
Poor adhesion usually results from inadequate surface preparation or contamination. The solution typically involves stripping the failed paint and starting over with proper prep work.
Uneven coverage can often be corrected by applying additional thin coats, but severe cases may require sanding and reapplication.
Texture problems such as orange peel or runs are usually caused by improper spray technique or environmental conditions during application.
Repair Techniques
Spot repairs can often blend seamlessly into the surrounding finish when done carefully with the same paint system.
Complete refinishing may be necessary for severely damaged or poorly applied trim paint, but this provides an opportunity to achieve perfect results.
Color matching is rarely an issue with black trim paint, but other colors may require careful selection to match existing trim pieces.
Frequently Asked Questions
How long does auto trim paint last?
Quality auto trim paint typically lasts 3-5 years with proper application and maintenance. The longevity depends heavily on environmental conditions, UV exposure, and the quality of surface preparation.
Factors like parking habits, climate, and maintenance routine significantly impact durability. Vehicles parked outdoors in harsh climates may need reapplication sooner than those stored in garages.
Regular cleaning and protection can extend the life of trim paint considerably. Some high-end formulations may last even longer with proper care.
Can I paint over existing trim paint?
Painting over existing trim paint is possible if the current coating is well-adhered and properly prepared. Light sanding and thorough cleaning are essential for good adhesion.
However, if the existing paint is peeling, cracking, or poorly adhered, it should be completely removed before applying new paint. This ensures the best possible results and longevity.
Multiple layers of paint can eventually build up thickness that affects the appearance and fit of trim pieces, so complete stripping may be preferable for heavily painted surfaces.
What’s the difference between trim paint and regular spray paint?
Trim paint is specifically formulated for automotive plastics and includes adhesion promoters, UV stabilizers, and flexibility agents that regular spray paint lacks.
Regular spray paint often fails on automotive plastics due to poor adhesion and lack of flexibility. It may also fade quickly when exposed to UV radiation and automotive chemicals.
The specialized chemistry of trim paint ensures better durability, appearance, and longevity compared to general-purpose spray paints.
How many coats of trim paint should I apply?
Two to three thin coats typically provide optimal coverage and durability for most trim painting applications. The exact number depends on the paint’s opacity and the condition of the substrate.
Each coat should be allowed to flash off properly before applying the next. Rushing this process can lead to runs, sags, and poor adhesion between coats.
Building up coverage gradually with thin coats produces a smoother, more professional appearance than trying to achieve full coverage in fewer heavy coats.
Do I need primer for auto trim paint?
Most modern trim paints include adhesion promoters that eliminate the need for separate primer on properly prepared surfaces. However, some situations may benefit from dedicated plastic primer.
Heavily weathered or chalky surfaces may require primer to ensure proper adhesion and uniform appearance. Very smooth or glossy surfaces might also benefit from primer application.
Always check the manufacturer’s recommendations for your specific paint and substrate combination to determine if primer is necessary.
Transform Your Vehicle’s Appearance Today
The right auto trim paint can dramatically transform your vehicle’s appearance while protecting valuable trim components from further deterioration. With proper preparation, quality materials, and careful application, you can achieve professional-looking results that last for years.
Don’t let faded, unsightly trim detract from your vehicle’s overall appearance. Take action today and restore your car’s trim to its original beauty with the techniques and knowledge you’ve gained from this comprehensive guide.